FortySeven Media Blog 2024-05-09T10:34:27-07:00 https://fortysevenmedia.com/blog/atom FortySeven Media info@fortysevenmedia.com https://fortysevenmedia.com/blog/archives/custom-pinterest-descriptions-in-craft-cms Custom Pinterest Descriptions in Craft CMS 2018-01-31T17:00:00-07:00 2020-02-05T23:51:20-07:00 Jonathan Longnecker https://fortysevenmedia.com/

Hey Pinterest people! If you’re like me you may not always think about optimizing your site or images for Pinterest. I’m not a big “pinner” myself, but I noticed that a chunk of our traffic at Tiny Shiny Home was being driven by some very popular pins.

So we knew we had to step up our Pinterest game. With that on our minds, the stars aligned as I was helping WP Tasty with a design project. Their blog was chock full of really great info about Pinterest descriptions and tags.

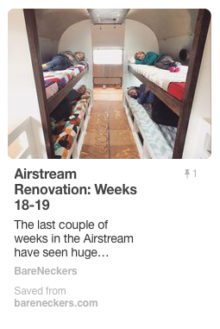
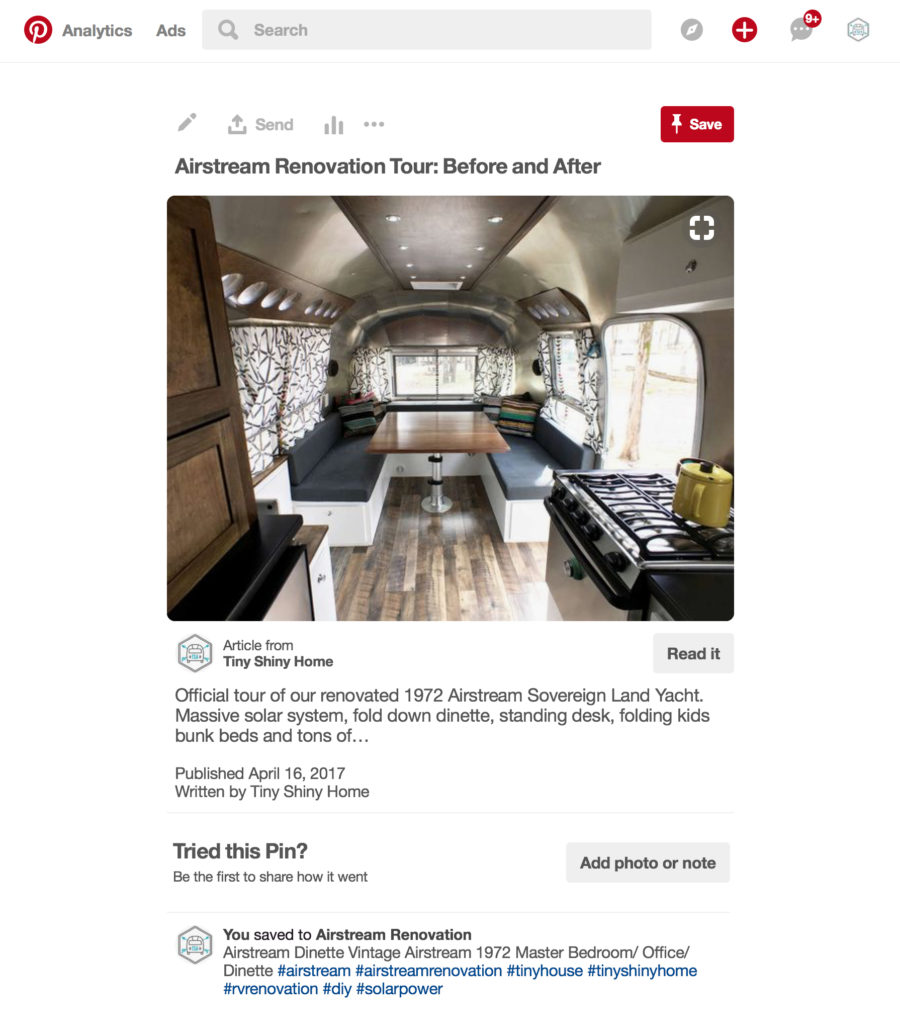
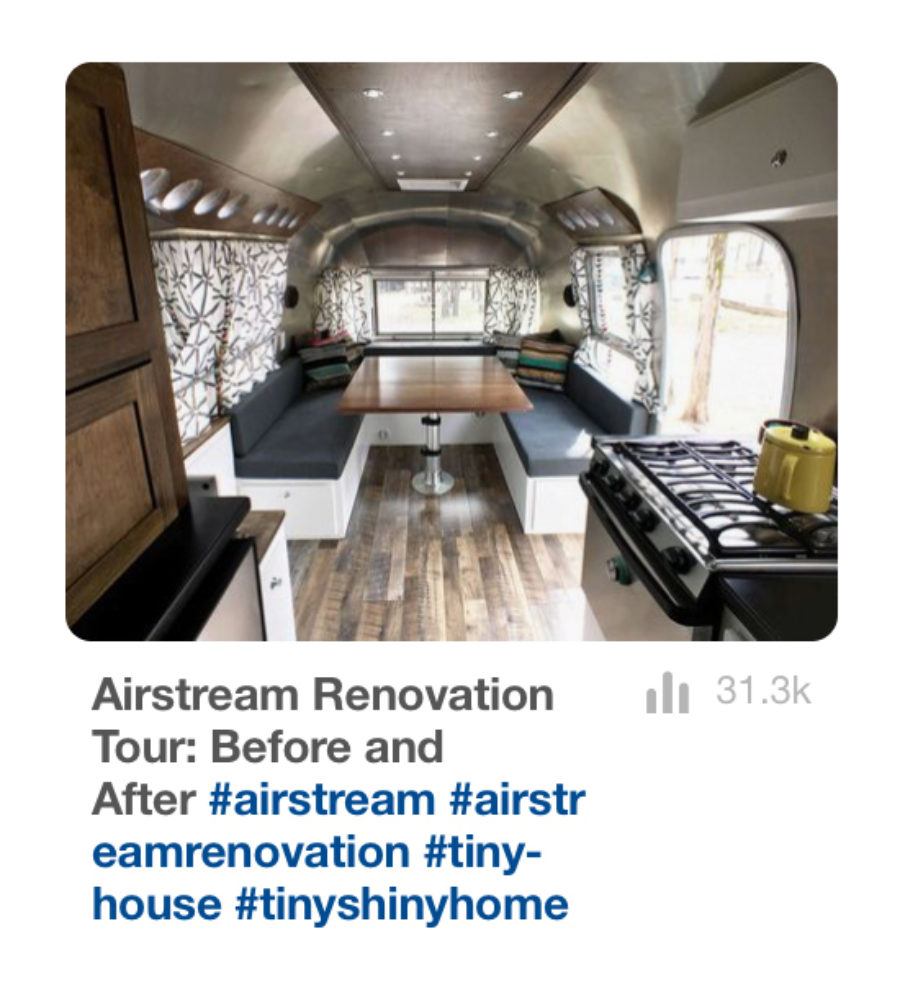
First up? relying on the alt tag isn't a great strategy. But you can use a custom Pinterest tag - data-pin-description - to pass through longer, better descriptions as well as hashtags. Both are vital for better searchability in Pinterest. The description isn't always super visible (see how it's near the bottom of the pin?) but hashtags are. More on that in a minute.

Plus it leaves your alt tag free to do what is was meant to in the first place.

Pinterest Pin With Description And Hashtags

I had no idea this was even a thing! WP Tasty actually made Tasty Pins, a Wordpress plugin to help take care of all this. But what if you don’t use Wordpress?

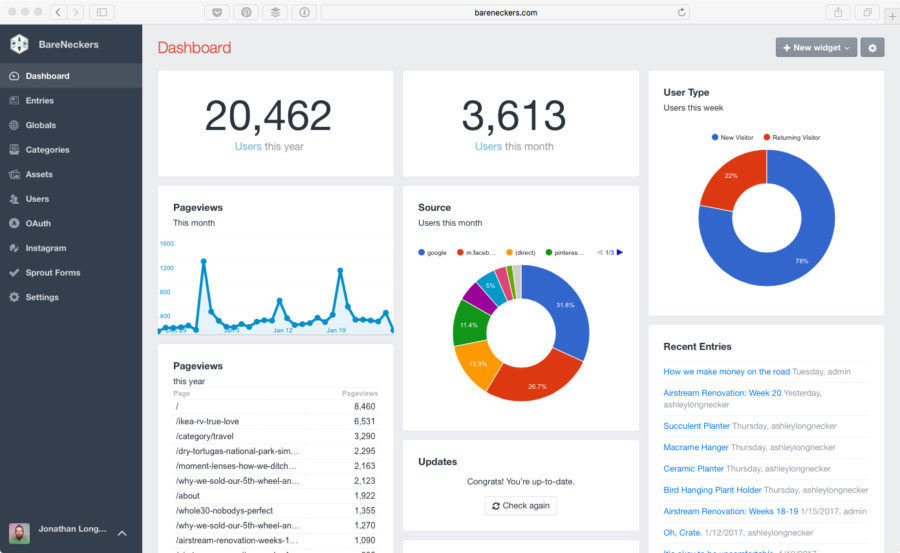
Turns out it’s pretty easy to make the basics of the plugin in Craft CMS with the native fieldtypes. The cool thing about Craft is that you can add any custom field to anything:

  1. Entries
  2. Categories
  3. Tags
  4. Users
  5. and yes - Images!

For this post I’ll just focus on two of the major features of the plugin: the custom Pinterest description and the ability to hide an image from Pinterest. Cause there may be a picture or two that you just don’t want pinned, amiright?

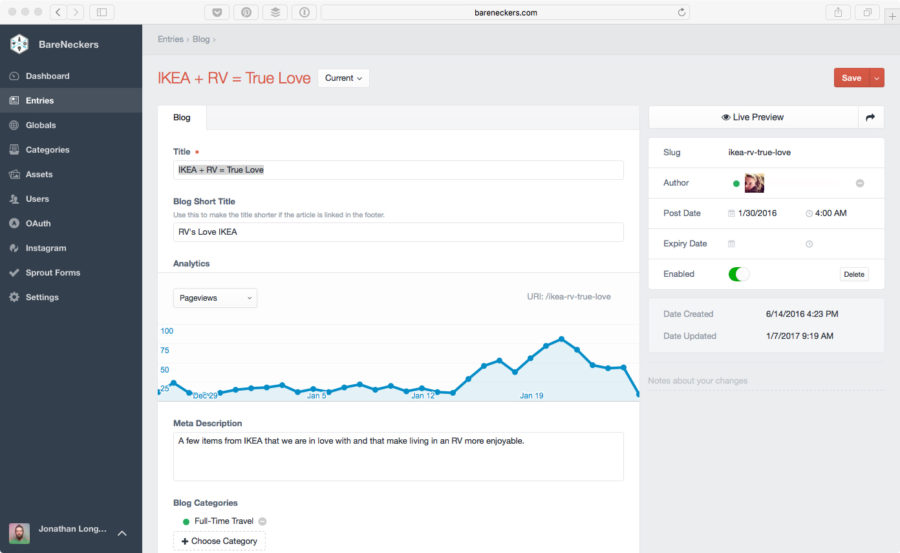
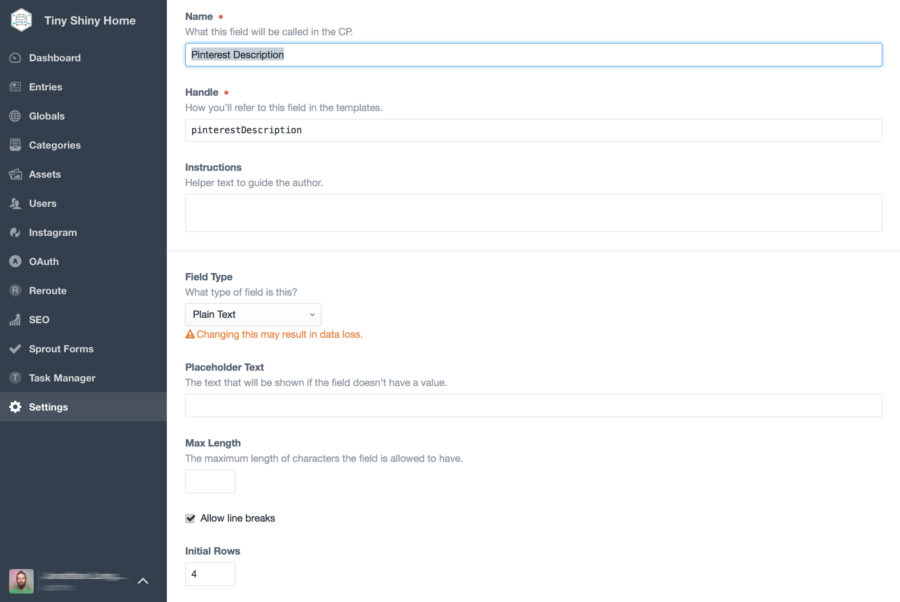
First create a new Plain Text field type and call it Pinterest Description - pinterestDescription. I turned on Allow Linebreaks and set the initial rows to 4 since I anticipated my descriptions being more than a short sentence.

Craft Admin New Custom Field Pinterest Description

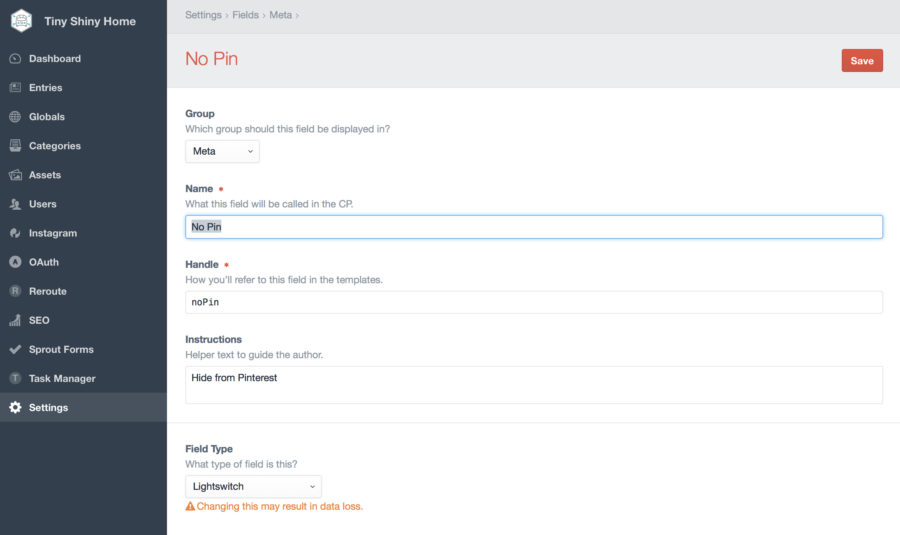
Then create a new Lightswitch field called No Pin - noPin. I put a quick instruction to remind anyone working on a post that this hides the image from Pinterest.

Craft Admin New Custom Field No Pin

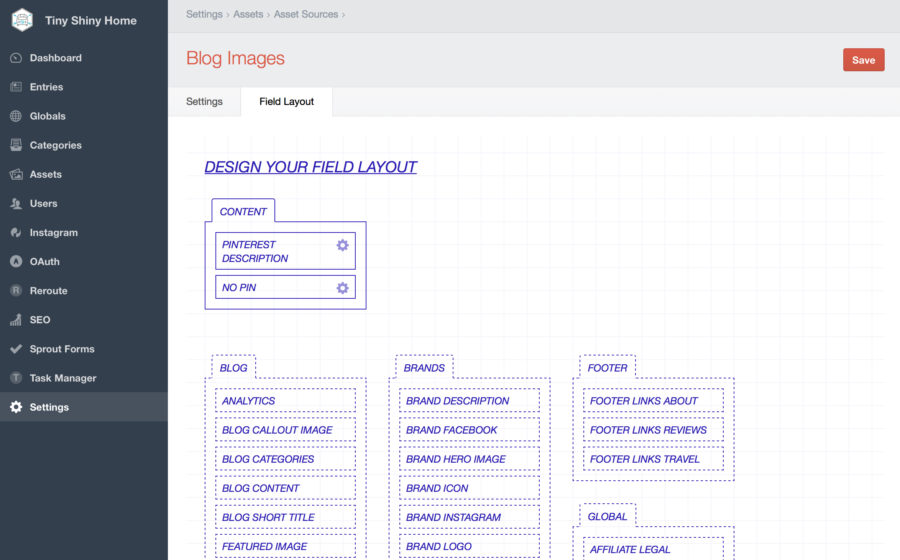
Then you just need to go to Settings > Assets and choose the Asset sources you want to add the fields to. Flip over to the Field Layout tab and drag your two new fields onto the layout and hit save.

Craft Admin Add Fields To Image

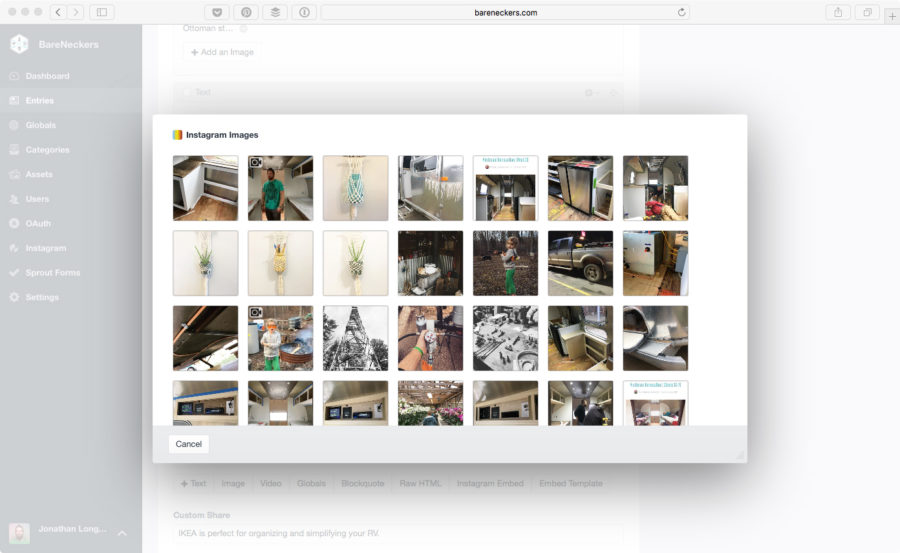
Now when you double click on an image to edit you’ll see the new fields:

Craft Admin Asset With Custom Pinterest Fields

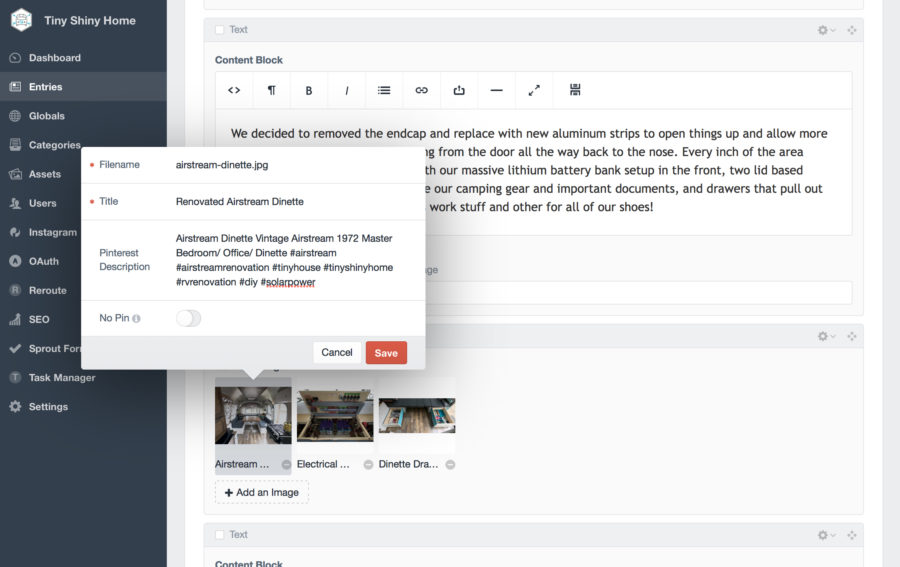
Fill in that description field to your heart’s content and even add some hashtags for good measure. The hashtags show up on listing pages, plus they’re clickable and searchable.

Pinterest Listing With Hashtags

To get Craft to render these new fields on your images all it takes is a few quick tags:

{% set image = entry.yourImageField.image.first() %}
<img class="full" 
 src="{{ image.getUrl('yourImageTransform') }}" 
 alt="{{ image.title }}" 
 {% if image.pinterestdescription %}
 data-pin-description="{{ image.pinterestDescription }}" 
 {% endif %} 
 {% if image.noPin %} 
 data-pin-nopin="true">
 {% endif %}
/>

And that’s it! You’ve just added the ability to create richer Pinterest descriptions for your images as well as hide any images that might not be appropriate for pinning. No plugins or Add-ons needed!

Have any other Pinterest + Craft CMS related tips? Let me know in the comments.

]]>
https://fortysevenmedia.com/blog/archives/tiny-craft-plugins-i-love Tiny Craft Plugins I Love 2017-04-17T17:00:00-07:00 2018-01-01T13:40:52-07:00 Jonathan Longnecker https://fortysevenmedia.com/

Sometimes you need to give a shout out to the little guy. I’ve run across a few Craft CMS plugins that may not be huge, but made my life easier. Want to know what they are? Read on.

Patrol

I grabbed this plugin because I was moving both 47m and BareNeckers to https. Dreamhost and redirects are a little goofy so I wanted to bypass .htaccess and use something built-in. Patrol does a great job with this. Install it, flip the secure connections switch and you’re done. You can set specific directories to be secured if you like, too.

Patrol also simplifies maintenance mode for your site. Flip it on and set a URL or directory to show visitors while you’re working on the site. You can even authorize IP addresses to go to the full site and bypass the maintenance page.

Task Manager

If you have any kind of caching or image transforms in place you may have gotten one of those “stuck tasks” things in the sidebar. Before the best way to deal with it was to dig around in the database and remove the offenders. That’s a pain in the butt, though. This little plugin gives you an interface in the control panel to see each process, when it started and the option to restart it or kill it. 

When I’m busy I appreciate plugins like this that not only simplify a needlessly complex process, but offload a tremendous amount of mental overhead when you’re in the middle of trying to write a blog post and don’t want to play tech support.

Template Select

I ran across this one when I was making a contact form on BareNeckers and wanted the page itself to be editable with my content matrix. This plugin lets you choose any of your templates from a dropdown and then you can include them on the page. Or do whatever you want to with them. 

It actually opens up a lot of possibilities for re-using templates in page layouts if combined with a Matrix field. Let your imagination run wild!

--

So that’s it - a tiny post for some tiny plugins. I hope they help you as much as they helped me. Do you have your own favorite tiny plugin? Let me know in the comments.

]]>
https://fortysevenmedia.com/blog/archives/creating-a-travel-route-or-points-of-interest-google-map-in-your-craft-cms-blog Creating a Travel Route or Points of Interest Google Map in your Craft CMS Blog 2017-02-01T17:00:00-07:00 2018-01-01T13:40:52-07:00 Jonathan Longnecker https://fortysevenmedia.com/ Google Maps with Custom Location Markers

In my last article, I talked about some quick ways to level up your Craft CMS blog. I mentioned that on my family's travel blog, we like to include a map of locations we talk about in each post. Nathaniel Davis asked in the comments if I could share more details on how that map is setup so here we are!

First, we started with the Google Maps for Craft plugin and created a custom map field called blogLocations.

Please note, this link above has been updated to a new repository that is being kept up to date. You will have to create a Google API key and enter it in the plugin's settings.

Adding a marker is as simple as searching a location or city and state. The field pulls the latitude and longitude for you automatically. For our setup I jump over to the content tab and put in a custom title and content. 

For our travel routes that means hand coding <a href=""> tags which is kind of a pain, but it works.

Google Maps Field
Easy to enter

We write about all manner of things, so not every post has a map - and we don't want to be pulling in all that gnarly javascript if we don't have to. So we start with a conditional statement to look inside the field's markers and see if there's something there before showing it.

{% if entry.blogLocations.getMarkers is not empty %}

Then we want to set some options for Google Maps. You can see I'm setting the ID, width and height as well as making sure the map doesn't zoom in and out as the user scrolls over it.

The syntax here really tripped me up for a while. Why do you need another options inside the options? I'm not sure. I think it has something to do with specific Google Maps options that aren't built into the plugin by default, but still accessible if you use Google's syntax. Maybe. I'm just guessing.

All I know is I finally got it to work!

{% set options = {
     id: 'map', 
     width: '100%', 
     height: '400px',
     options: {
          scrollwheel: false
                }
} %}

Then we set a variable for the map to pull in the options we just set.

After that we start a for loop to get the markers to place on the map. I wanted my info boxes to have certain styling and information in them so you can see that I had to set an address variable and put my content in manually - then call it further down in the marker loop.

They syntax here is weird also - you can't use craft brackets, but instead wrap each variable with a '~ xxx ~'.

Finally, the {{ map }} tag pulls it all together, injects the javascript and makes the magic happen.

{% set map = craft.googleMaps.map(options) %}
			
     {% for markerCustom in entry.blogLocations.getMarkers() %}
  {% set address = '<div class="marker-content"><h3><span class="count">' ~ loop.index  ~ '</span> ' ~ markerCustom.title ~ '</h3><p>' ~ markerCustom.content ~ '</p></div>' %}
          {% set marker = {
               lat: markerCustom.lat,
               lng: markerCustom.lng,
               content: address,
          } %}

          {{ craft.googleMaps.marker('map', marker) }}
     {% endfor %}
			
{{ map }}

I wasn't sure users would know that they could click on each maker pin for more info, so I also included a list with the same information below. This worked especially well for our yearly travel route posts to give them a sense of order and faster links to corresponding articles.

Google Maps Locations Only

Here we start the loop by getting the markers first thing, use a loop.index to number each result and pull the content in the way we want it.

<h2>Locations in this post</h2>
<table class="location-grid">
     {% for marker in entry.blogLocations.getMarkers() %}
     <tr>
          <td class="row-count"><span class="count">{{ loop.index }}</span></td>
          <td><h4>{{ marker.title }}</h4></td>
          <td><p>{{ marker.content|raw }}</p></td>
     </tr>
     {% endfor %}
</table>

<!-- Don't forget your ending if statement -->
{% endif %}

You can download a text file of the whole thing below.

Download Template

And that's how you wrangle a multi-location map into a Craft CMS travel blog! Using this on your own site? I'd love to hear about it.

]]>
https://fortysevenmedia.com/blog/archives/tips-for-making-a-kick-awesome-blog-in-craft-cms Tips for making a kick awesome blog in Craft CMS 2017-01-24T17:00:00-07:00 2018-01-01T13:40:52-07:00 Jonathan Longnecker https://fortysevenmedia.com/ Bareneckers Article
My Blog!

Recently I moved my family’s travel blog from ExpressionEngine to Craft CMS. You can read about the why here, but I wanted to take a few minutes and talk about some of the things I’ve learned building a travel blog with Craft.

Matrix Content Block Editor is Excellent

I didn’t think our simple blog would benefit too much from having customized content blocks, but I quickly realized how useful they could be. Text and image blocks are no brainers, but having a consistent way to drop in videos, block quotes and just raw HTML for embeds proved to be very useful. 

I even setup a block that pulls from two globals to show legal language for affiliate links or compensated reviews. That way it’s easy to include, we don’t forget, and the language is consistent throughout the site.

Meta Tags for Facebook, Twitter & Pinterest

Like it or not, a good chunk of our traffic comes from social networks like Facebook and Pinterest. And in more recent years they’ve gotten pretty grumpy about how they scrape your pages and format them. We’ve found that with a few special meta tags they are much happier.

Share Pinterest

Pinterest

<meta property="og:type" content="article" />
<meta property="article:published_time" content="{{ entry.postDate.iso8601 }}" />
<meta property="article:author" content="{{ entry.author.fullName }}" />

Validate and apply for rich pins to be enabled


Share Facebook

Facebook

<meta property="og:type" content="article" />
<meta property="og:url" content="{{ entry.url }}">
<meta property="og:description" content="{{ entry.metaDescription }}">
<meta property="og:site_name" content="{{ siteName }}" />

<!-- We use a custom field to override the title for different sharing options -->
<meta property="og:title" content="{% if entry.customShare %}{{ entry.customShare }}{% else %}{{ entry.title }}{% endif %}"/>

<!-- Setup your image transform to match Facebook's image guidelines. -->
<meta property="og:image" content="http://yourwebsite.com{% set imageFeatured = entry.featuredImage.image.first() %}{{ imageFeatured.getUrl('postShare') }}"/>

Debug and test shared Facebook content


Share Twitter

Twitter Cards

<meta name="twitter:card" content="summary_large_image">
<meta name="twitter:site" content="@BareNeckers">
<meta name="twitter:creator" content="@necker47">
<meta name="twitter:description" content="{{ entry.metaDescription }}">

<!-- We use a custom field to override the title for different sharing options -->
<meta name="twitter:title" content="{% if entry.customShare %}{{ entry.customShare }}{% else %}{{ entry.title }}{% endif %}">

<!-- Setup your image transform to match Twitter's image guidelines. -->
<meta name="twitter:image" content="{% set imageFeatured = entry.featuredImage.image.first() %}http://bareneckers.com{{ imageFeatured.getUrl('postShare') }}">

Validate your Twitter Card


You probably won't want to used these tags for every page, but just for the article pages. Use the parent tag to inject the meta tags from your _entry template into your _base layout template like this:

{% block head %}
	{{ parent() }}
	<meta property="og:type" content="article" />
	etc...
{% endblock %}

Helpful Plugins

Even though one of Craft’s selling points is just how much is already built into the system, I found that with just a couple of plugins, I was able to add some really powerful and useful functionality to the blog. Let’s look at what we used below.

Analytics

This hooks into your Google Analytics account and shows you traffic stats for each entry which is super helpful.

Analytics Entry
Looks like this one is getting more popular

It also comes with dashboard widgets. This lets you create custom reports for your dashboard using your analytics data. We’ve already used to identify how our traffic spikes for each article we post as well as what our top visited pages are.

Analytics Dashboard
Set these up to show exactly what kind of data and visual you want

All in all we've found the plugin solid and incredibly useful. Grab a copy here.

Instagram Pic Puller

If you use Instagram then Pic Puller is a great way to connect your blog to your account. It also comes with two methods - a custom field that lets you choose from images in your Instagram account and embed them in your post while giving you complete control over the layout and data you show.

Pic Puller
Choose your own Instagram images to embed

And a tag that pulls from your feed and updates automatically. We even used hashtags to get the images we want to show on our homepage.

Image Transforms

You’d be amazed how many people just upload full-size pictures to their website. Even phones now spit out huge image files. If you want your site to slow to a crawl, go ahead and upload them like that. Or use Craft’s built in image transforms to make sure the image your visitor sees is scaled down and compressed properly. 

This is also useful for making sure the images you’re sending to Facebook or Twitter are sized and cropped to their specifications without having to make a bunch of custom versions of the image yourself.

Location Pins

This is probably more specific to a travel blog, but we used Google Maps for Craft to let us embed a map at the end of each post with plotted points for each location we talk about in the article. 

Google Maps Field
Easy to enter

We also use this to plot our yearly travel route. The info window then links to the appropriate article.

Google Maps Template
That's a lot of places, yo

It’s a little complicated to setup, but once it’s running we find it adds a lot of value to our travel posts.

Truncate 

We added a new section to the site recently - a curated adventure product shop. To keep things clean, responsive and gridded up we really needed to truncate the length of some of our titles. 

Truncate
Keeping that unruly title on the bottom right contained
{{ entry.title | truncate('characters', '60', '...', true) }}

This little plugin can limit your characters, strip HTML tags and lets you add anything you want to the end of the truncation. Nothing huge, but the syntax is clean and it works great. Grab a copy here.

Keep things lean

Probably the biggest upside of using something like Craft instead of WordPress for your blog speed and simplicity. WordPress makes things simple to add via Plugins, but their dirty secret is that they litter your site with links to stylesheets and javascript files. Have a WP site with a few plugins? Go ahead and view source and see just how many random files are being linked to and loaded. 

Craft does absolutely none of this. You choose exactly what files you want to load. So you can truly keep your site clean and quick - something that Google is valuing more and more highly these days.

--

That's all for this time. Do you have any go to tricks you use to make your Craft CMS blog awesome? Let me know in the comments!

]]>
https://fortysevenmedia.com/blog/archives/use-instagram-hashtags-to-populate-content-on-your-craft-cms-site Use Instagram Hashtags to Populate Content on Your Craft CMS Site 2017-01-10T15:00:00-07:00 2018-01-01T13:40:52-07:00 Jonathan Longnecker https://fortysevenmedia.com/

It only took 5 years, but I have finally gotten around to designing a proper homepage for my family’s travel site. No longer just a list of blog entries, it’s a full-on proper landing page intended to tell our story and guide visitors to the place they want to go.

One thing I thought would be cool was a block of images - and since we post to Instagram so much I really wanted to pull them from our account. But I didn’t just want the newest image to show up every time. Sometimes we post videos and other images that wouldn’t look good on the homepage.

I set about to see if there was a way to tell Craft CMS to pull only Instagram images that matched a certain criteria.

Turns out there’s a great plugin called Pic Puller- and also some great customer support from John Morton, it’s creator. 

Pic Puller does more than just load up a users’ images from Instagram in a template, though. It also comes with an integrated custom field that lets you search through your account and embed your media from Instagram. You can even customize the markup of the captions, tags and other bits of data to truly integrate everything into your design. Very cool!

I got to wondering if we could use a hashtag to tell Pic Puller which images to use for the homepage. A quick email to John and he sent me an excellently detailed example which he’s graciously offered to let me share with you below:

<!-- There is no breaking out of a loop in Twig, so set a variable to do that for you -->
{% set break = false %}
<!-- Loop through the instagram data -->
{% for instagramdata in craft.picpuller.media_recent({'user_id' : 1,  'use_stale_cache' : true }) if not break %}
  
  {% if instagramdata.status == 'true' %}
    <!-- Look for the tag "#homepage", but be sure to leave off the opening # -->
    {% if 'homepage' in instagramdata.tags %}
      <!-- Found a #homepage, so let's make this the last time we do the loop -->
      {% set break = true %}
      
      <!-- Show the thumbnail image for this piece of media -->
      <div class="instagramimage" style="background-image: url({{instagramdata.low_resolution}});"></div>   
    {% endif %}
    {% else %}
      <!-- This shows Instagram generated errors -->
      <p>Error Type: </p>
      <p>Error Message: </p>
  {% endif %}

{% endfor %}
{% if not break %}
<!-- the variable "break" was never set to 'true' which means the hashtag we were looking for wasn't found -->
  {% set instagramFallback = craft.assets.filename('backup.jpg').first() %}
  <div class="instagramimage" style="background-image: url({{ instagramFallback.getUrl('homeTabs') }});"></div>
{% endif %}

So basically as long as one of my most 15-20 recent Instagram pictures has a hashtag of #homepage it’ll grab it and insert it on the page. If not, then I can define a fall back. I’ve integrated with my Image Transforms for the fall back images as the source versions are pretty big.

This is a great way for brands to keep using Instagram, but update their main site effortlessly. I know we’re digging it!

Thanks again to John for the top notch support. Make sure to go grab a copy of Pic Puller for your Craft site today!

]]>